Wednesday, 25 February 2015

Royale Squares & Stripes wrap


I fell in love with this yarn instantly.
Not a clue what I would make with it but I just had to have it.


Since the coldest period of winter in Eastern Europe seems to be over, I decided to create a piece of "crochet-art" which can be used in this in-between period. A warm wrap to use during colder evenings.


I have written down the pattern for you. 
It is a very easy pattern, I hope you enjoy it!

To add to your Ravelry que, click the ravelry image


Stitches & terms used:

SC: single crochet
DC: double crochet
CH: chain

Yarn used:

Wibra Fenna Yarn
Suggested needle size: 4 - 4,5 mm ( I used a 4.5 mm hook)
100% acrylic

Use any yarn you like plus hook as suggested. 


Pattern:

The width of your wrap depends on the yarn you use incombination with the length of your base chain. Your base exists out of a multiple of 3 + 3.

With my yarn I made a base chain of 84 chains.


1) DC in 3rd chain from hook, DC back over your base chain, turn (82 DC)

2) Chainless starting DC, CH2, skip 2 stitches, DC, [CH2, skip 2, DC] repeat between brackets to end, turn

3) repeat row 2

4) Chainless starting DC, DC in every stitch to end, turn

5) repeat row 4

Graphic chart of pattern
The pattern is repeating itself. In the graphic you can see how it repeats. 
Keep repeating row 2 twice, followed by row 4 twice.

You last row should be one row of DC's. Just like you started.

Finishing:

When you've made your final DC, turn and SC around the complete border of the wrap.
In every corner you place a SC, CH2, SC, this way you get nice square corners.

Your final round along the borders should be:

SC along the long sides of your wrap             
[SC, CH2, skip1] along the short sides (picture)


[SC, CH2, skip1]
Finish off.

Before you add your tassels, you might want to block your shawl / wrap.
It really makes a nicer result. I usually pin large items down on the carpet and spray it with water. It usually dries in one night.


Now you can add tassels through the CH2 spaces along your short boders if you like.


Enjoy!

Sunday, 15 February 2015

Sally - the unicorn

I stumbled on this really really really cute pattern.... 
(it wasn't hard to miss actually since it was spread on the web like a virus)


And like I said earlier.... I had some really busy days at work and it it nice to get your mind thinking about something cute, pink and fluffy at such times.


The best reward for making these toys is the happiness you receive afterwards. The only thing I got confused about was the name my daughter gave the unicorn.... I was thinking "Pegasus", but she immerdiately said: "Sally!!" So Sally was born.


At first I made all the separate parts. This pattern uses quite a large hook and matching yarn. I did not size down the hook as that is what I usually do when I make amigurumi's. So keep in mind, if you want a softy without seeing openings in the structure.
I advice you to use smaller hook with your yarn, size down 0,5 to 1 mm.


 I used several colours for the tail and manes, the fun thing about this project is that you can take any colouring you like to create the unicorn from your imagination. I was inspired by the original design.


 For the horn I used an extra silver thread to give it a magical look.


For the tail I made strings of 34 chains, HDC in 3rd chain from the hook, mix 3 HDC and 4 HDC in every CH. The pattern will explain how to attach them.

If you like this pattern, it is designed by 1dogwoof, you can find the pattern through the link.


Have a lovely day!
Marion.


Wednesday, 11 February 2015

Loving Black & White


Just a nice pattern with some tips on crochet techniques


Stitches & terms used: 

YO: Yarn over
SC: Single crochet
DC: Double crochet
SLST: Slip stitch
CH: Chain

FPdc: Front post double crochet:

YO, insert hook into space between the post of the current and next DC in the row below, bring the hook through the nest space, going behind the the post, YO, pull hook through the spaces (3 loops on hook), YO, pull yarn through first two loops on hook, YO, pull through last two loops. done


RevSC: Reverse single crochet

Reverse Single Crochet

Pattern

1) Double Crochet chainless foundation chain of 90 DC's (instructions can be found over HERE)

2) CH2, FPdc around, SL ST to 1st DC (skip the Ch2 to SlSt in 1st DC)

3) In this row you start with the heart pattern. Repeat row 2 BUT, attach white yarn in the 46th stitch.

changing colour in a DC, do your DC as normal but your last YO should be with your new colour so the last loop you pull through is the nw colour.

Start the heart pattern according to this diagram, you start at the bottom. Every box is a stitch.

So in row 3 you switch back to black immediately.


4) Use the same technique as used in row 3 but follow the heart pattern to see where you change colours.

5 / 14) Continue untill you have all rows with the heart pattern

15 + 16) Only use black, repeat row 2

17) CH1, SC around, SlSt in 1st SC

18) RevSC around, finish off


Attatch yarn to the other side

19) CH1, SC around, SlSt in 1st SC

20) RevSC around, finish off


I also made matching Bootcuffs.

I made these, based on the brooklyn boot cuffs pattern by CrochetDreamz.


Have fun!

Wednesday, 4 February 2015

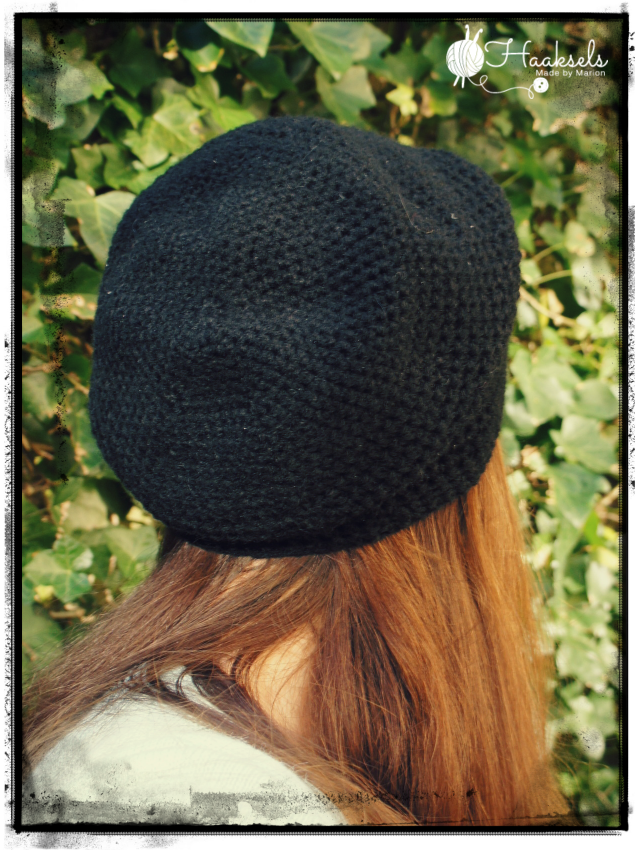
Slouchy Flip-it Beanie


A slouchy beanie made with a reasonably thin yarn. This makes the texture come out nicely.
It also creates a slightly less thicker hat than your typical winter hats. But by using a nice warm yarn, containing wool, you will still have a hat that is warm enough.

Click on Ravelry image to add to your que
Yarn used: 225 m. Baby Wool Light colour Black from www.haakselswolwinkel.nl
Gauge: 18 stitches and 26 rows on 10 cm x 10 cm (4' x 4')
Hook used: G - 4 mm
Size made: Adult

Stitches / terms used:
The pattern is written in US crochet terms.
SC = single crochet
ESC = extended single crochet
ST = stitch
CH = chain
YO = yarn over

Extended Single Crochet:
Insert your hook into next st, pull up loop, YO,
pull up through first loop on hook, YO again,
pull through the remaining 2 loops on hook.

ESC increase: 
2 ESC in same ST

ESC decrease:
Insert hook in next ST, pull up loop, insert hook in next ST,
pull up another loop (3 loops on hook), YO,
pull through first 2 loops on hook, YO, pull through last loop.

If you want your hat to fit on a smaller hat then stop increasing
sooner than pattern. If you are using a yarn with
the same thickness I would suggest:

Male: follow pattern
Female: stop after round 15, pick up pattern from round 17
Child: stop after round 11 (or 13), continue at round 17
These are only suggestions! Please adjust according to your own liking.


Pattern

Start with a magic ring, (I prefer a Double Magic Ring, it is a bit more firm)
Every round that starts with a CH1, start your first SC in the same ST.


1) 10 SC in Magic Ring, SL ST to 1st SC (10)

2) CH1, increase in every SC, SC into your SL ST of round 1  (21)

3) CH1, SC around, SL ST to first ST (21)

4) CH1, [2 SC, increase] around, SL ST to 1st ST (28)

5) CH1, [3SC, increase] around, SL ST to 1st ST (35)

6) CH1, [4SC, increase] around, SL ST to 1st ST (42)

7) CH1, [5SC, increase] around, SL ST to 1st ST (49)

8) CH1, [6SC, increase] around, SL ST to 1st ST (56)

9) CH1, SC around, SL ST to 1st ST (56)

10) CH1, [7SC, increase] around, SL ST to 1st ST (63)

11) CH1, SC around, SL ST to 1st ST (63)

12) CH1, [8SC, increase] around, SL ST to 1st ST (70)

13) CH1, SC around, SL ST to 1st ST  (70)

14) CH1, [9SC, increase] around, SL ST to 1st SC (77)

15) CH1, SC around, SL ST to 1st ST (77)

16) CH1, [10ESC, increase] around, SL ST to 1st ST (84)

17/26) CH1, ESC around, SL ST to 1st ST (84)

27) In this round you should make 4 ESC decreases. Even them out. (see pic.1)
       CH1, ESC around including 4 ESC decreases, SL ST to 1st ST (80)

Pic. 1

28) Repeat row 27 (76)

29) CH1, ESC around, SL ST to 1st ST (76)

30) CH1, In this round you should make 2 ESC decreases. Even them out. (see pic. 2)
       CH1, ESC around including 2 ESC decreases, SL ST to 1st ST (74)

Pic. 2

31) Repeat row 27 (70)

32) CH1, ESC around, SL ST to 1st ST (70)


Now continue repeating row 32 untill you reached your desired length. 

I continued untill the hat had a length of +/- 30 cm. In total I made 28 rounds of ESC stitches. Last 4 rounds: SC around and finish off, you can of course add any border you prefer.

Now turn your hat inside out! Tadaa


Click on this image to get this yarn

Sunday, 1 February 2015

Alpaca deep waves infinity cowl


I made this cowl for my sister in law, who asked me to create her a special cowl, one you don't find on the corner of every street.


So I decided to mix a good quality of Alpaca wool with my pattern Deep Waves Infinity cowl.

At both ends of the cowl I added an extra type of yarn to put some extra detail in it.


If you like this yarn, it comes in great colours! I used the Grey, Cream, Camel.


Click on this image to get this yarn