Monday, 6 April 2015

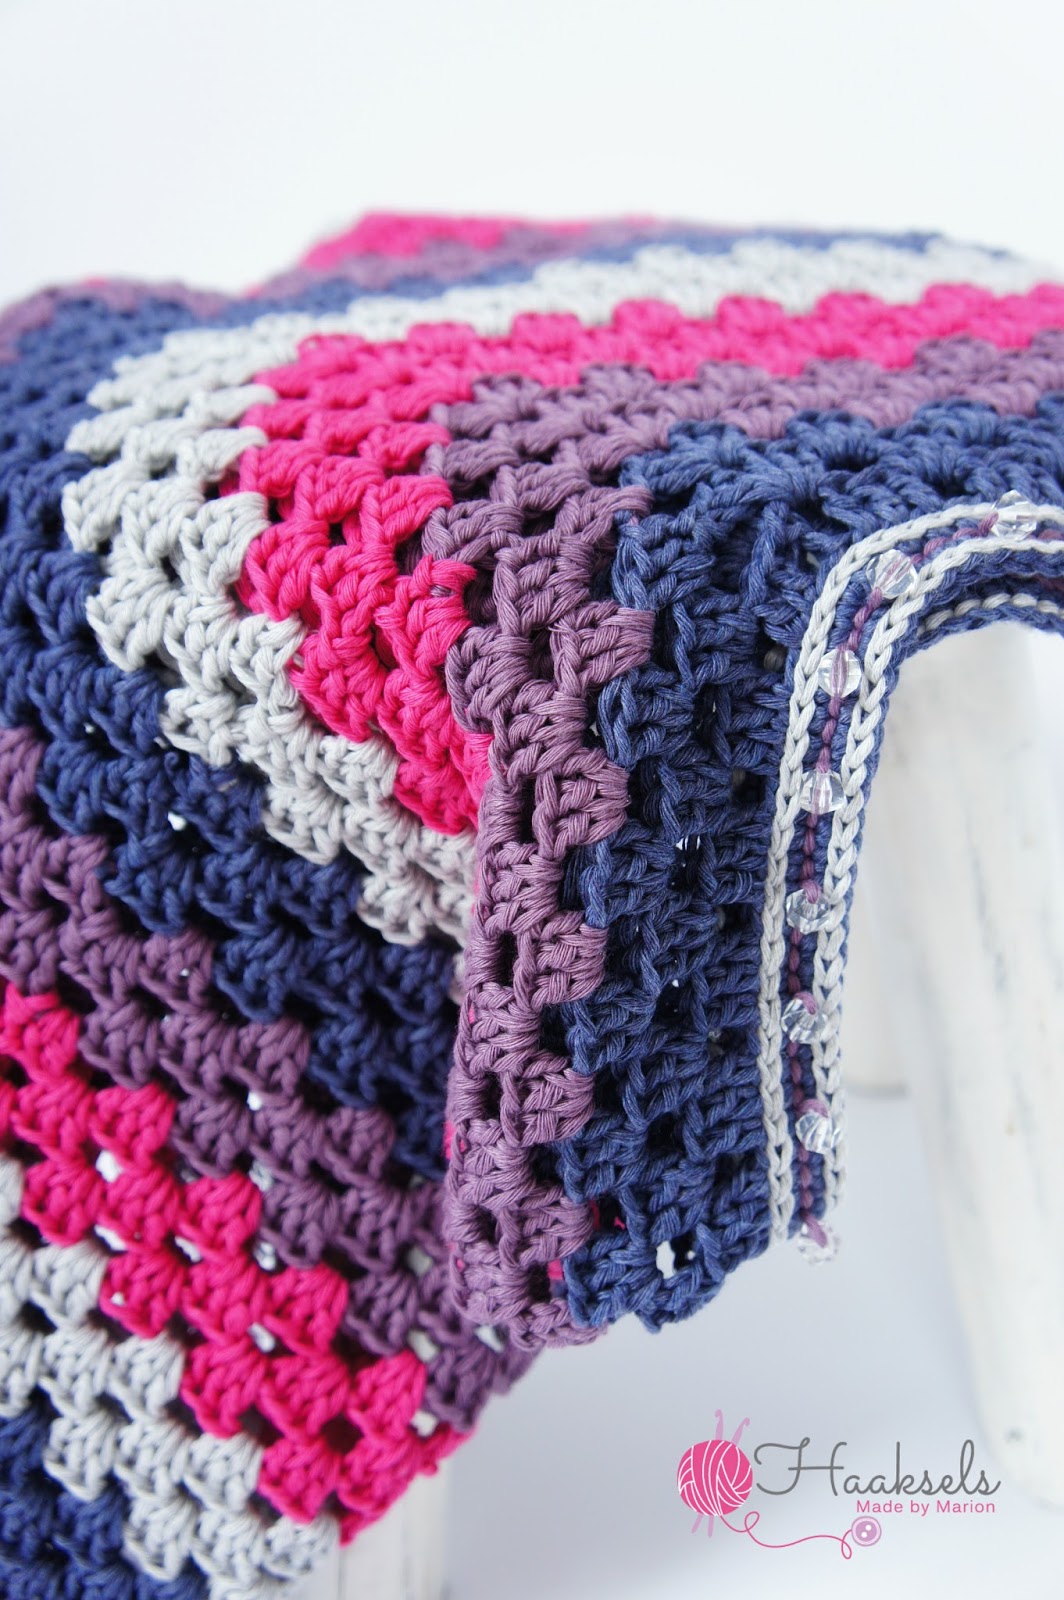
Little Princess Poncho


A second poncho already! I know I know.... but I just had this yarn laying around for so long... screaming at me to make a poncho out of it.

This time I finished 3 rows and then changed to another colour.
I used a polyester / cotton mix. 
Cotton is not my favorite yarn to crochet with since it tends to split while I work with it. 
But it does give a very clean look to your work.


My daugther is into living the life of a princess right now, so I decided to add some diamonds to the design, as every Little Princess should have some bling-bling.


I used the beads during my crochet work.
Just add the needed amount of beads on to your yarn before you start your crochet round where you want to place them.
Be sure to place enough beads onto your yarn, in case you're not sure, place extra so you don't run short. (else you'll have to finish off and attach new yarn with beads along the way)


Slide your beads back a bit and attach yarn as usual. Crochet untill you reach the spot where you want to place your bead, slide the bead towards your knot and place your next stitch behind / after your bead. I worked a round of slip stitches at the back side of my work and added the beads in the stitch at the front. (this sounds harder than it is)

Here's a video, DROPS made about the technique of placing beads in your work.

I hope I gave you a bit of new inspiration for a nice project.
You can read all about the pattern in this blogpost on www.haaksels.nl

Have fun!

Saturday, 4 April 2015

Romantic Poncho


I think this is a great piece of garment to add to your spring wardrobe.
Airy but yet adding a bit of warmth when you need it.


You can turn it into any style by selecting the yarn that fits your mood.
For this piece I used a yarn with a sparkle, 
It is really subtle but reflects when sunbeams hit the poncho.


The poncho works up really quick. It took me 3 evenings.
And since it is so easy to crochet... you can easily watch a movie while you work on it.

The pattern for this poncho is free and can be found over here

Make sure your starting chain is a multiple of 8! 

Since I received some requests for writing the instructions down, instead of the schematic, here it is: 

The exact translation of the schematic:
I use US crochet terms!

Stitches used:
CH : Chain
DC: Double crochet
Sl St: Slip stitch


1. Crochet your neck by making a chain that exists of a multiple of 8, Sl st to 1st CH


2. CH3, 2DC, CH1, [3DC, CH1] to end, Sl St into 3rd CH of 1st CH3 (of course you can also use a Chainless starting DC to start with instead of the CH3)

Your last chain space will be the increasing space, search for the space on the exact opposite and mark it with a stitch marker.

3. CH3 (or chainless starting DC), 2DC (in last chain space of formar row), CH1, [3DC, CH1] untill you reach the marked CH space, [3DC, CH1, 3DC] in marked CH space, [3DC, CH1] untill you reach the first space you worked in, add [3DC, CH1] to this space and Sl St to 3rd chain of your starting CH3. (or Sl St to your chainless starting DC)

When you look at the schematic (row 3 is the yellow row) The 3 circles are the starting CH3, the stretched crosses are DC's, so it is CH3 plus 2DC in same chain space)

4. Repeat row 3 untill your poncho reaches the desired length.


The additions I made to the schematic are:

1. Start with Chainless DC's, this way the opening for the head will be flexible. (with a stretch)
2. After you finished your last row, add a row of slip stitches on the edge. This way it will get a bit of extra body.
3. To the top, add a row of SC's and then slip stitch over that round, again to add a nice finishing touch and toughness
4. Add tassels


If you don't crochet but would like to have this poncho.
Just contact me.


Wednesday, 25 March 2015

Granny Square Flower pillow


One of my favourite colours is aqua blue / green. 
Another thing I love is stacking qranny squares.


This square I designed myself, here you find the link to the pattern.


In the end I created 16 crochet squares, using white and green bases.


I put the squares together using single crochets over the top.
First do all the vertical (or horizontal) and then add the rows across.
To cross the lines, add a chain stitch and then continue your single crochets.


The border exists out of 2 rows of SC's. In every corner you place [SC, ch2, SC]
That way you get a nice corner.
The pattern for the bobble edge can be found over here.


I have sown my own pillow case but you can also buy an already made pillow case and sew your crochet work onto it.


I just love playing with textures and colous.


Have fun creating your own pillow!


Saturday, 14 March 2015

Baby Blue (baby) Booties


Adorable booties, they are so much fun to make! I lost count of the amount of baby booties I produced during my crochet career.


Every time I find new patterns I just need to try.
Right now I've got a really good excuse to make more because my sister is expecting again!


I like these because they look a bit macho... not totally baby-like. Yet by playing with colour you can make them look as sweet as candy.


The patterns is made by Amanda Chapman of Newborn Knots. She makes amazing patterns.
HERE you can find the link to this booty pattern.


I make these on order as well.


Sunday, 8 March 2015

Haaktermen vertaald - Crochet terms translated

When you are used to crochet in Dutch, reading a US pattern might seem a reason to not ccrochet that item. Today I will help you on how to read US crochet terms. It will help you to read my patterns as well since I use US terms for all of them.

To make it more complicated, English crochet terms differ from US terms. Always check if a pattern is written in US terms or English terms.


These are the stitches which are used most.
I hope this will help you crochet any lovely pattern you find.


Saturday, 7 March 2015

Pimp your shoes


Yesterday I bought this cute little outfit for my daughter.
And as I walked out of the store I realised..... "I don't have matching shoes with those clothes"

Black and yellow just doesn't match with pink or purple boots.
I decided to buy a pair of simple gym shoes and give them a make-over myself.


So I thought I'd share this little make-over with you. It is done within 30 minutes and it will save you an expensive extra pair of shoes.

What do you need:
  • A pair of cheap gym-shoes (black / white / pink)
  • Yarn in any colour to match your outfit or take any colour that makes you happy.
  • Glue gun
  • Any decoration objects: buttons, ribbons, studs etc.
Now get crazy.


For my shoes I made two crochet-flowers and glued them on with a hot glue gun. On those two flowers I glued a nice bow. (this one was ready-made but you could tie one yourself ofcourse)
Then in the end I added some glue on studs. And tadaaa!! My own design shoe.

Let me tell you how to crochet the flowers.

1, Make a migic ring, CH1

2. In the ring you make 5 petals. 

First petal: SC, CH1, DC, CH1, TR, CH1, DC, CH1, SC, Sl St into ring.

2nd till 5th petal: CH1, SC, CH1, DC, CH1, TR, CH1, DC, CH1, SC, Sl St into ring.

finish off and close the ring. Tie a knot with both yarn ends.

pattern for 1 petal

Enjoy your creation!


Wednesday, 4 March 2015

Mr. Fox


Hi everyone,

I could not resist this pattern. It is an easy to follow pattern designed by Krissie dolls. You can find the pater over HERE. The pattern is in Dutch but perhaps she will translate it as she did with other patterns.


I used two strands of sockwool to achieve this result. The eventual doll will be +/- 50 cm's from top to toes.


A lovely toy to give away as a B-day present or to keep as you will fall in love with it instantly.

The amazing Mr. Fox